

If you’re reading this, there’s a good chance you’ve got a fleet of Chromebooks and a growing headache. Dead batteries before second period, a line at the help desk by 8:05 am, teachers improvising because half the class can’t log in – sound familiar? You’re not alone, and yes, there’s a better way.
Do Schools Really Need Chromebook Charging Lockers?
If you’re running 1:1 or shared Chromebook programs, smart charging lockers almost always pay for themselves. Smart lockers save tech teams roughly 80% of the time they’d normally spend managing devices. Students can check out loaner devices in under one minute. That’s not a marketing number – districts like Hamilton County Schools (44,500 students) went from hours-long or days-long wait times for loaner Chromebooks down to minutes after deploying smart lockers.
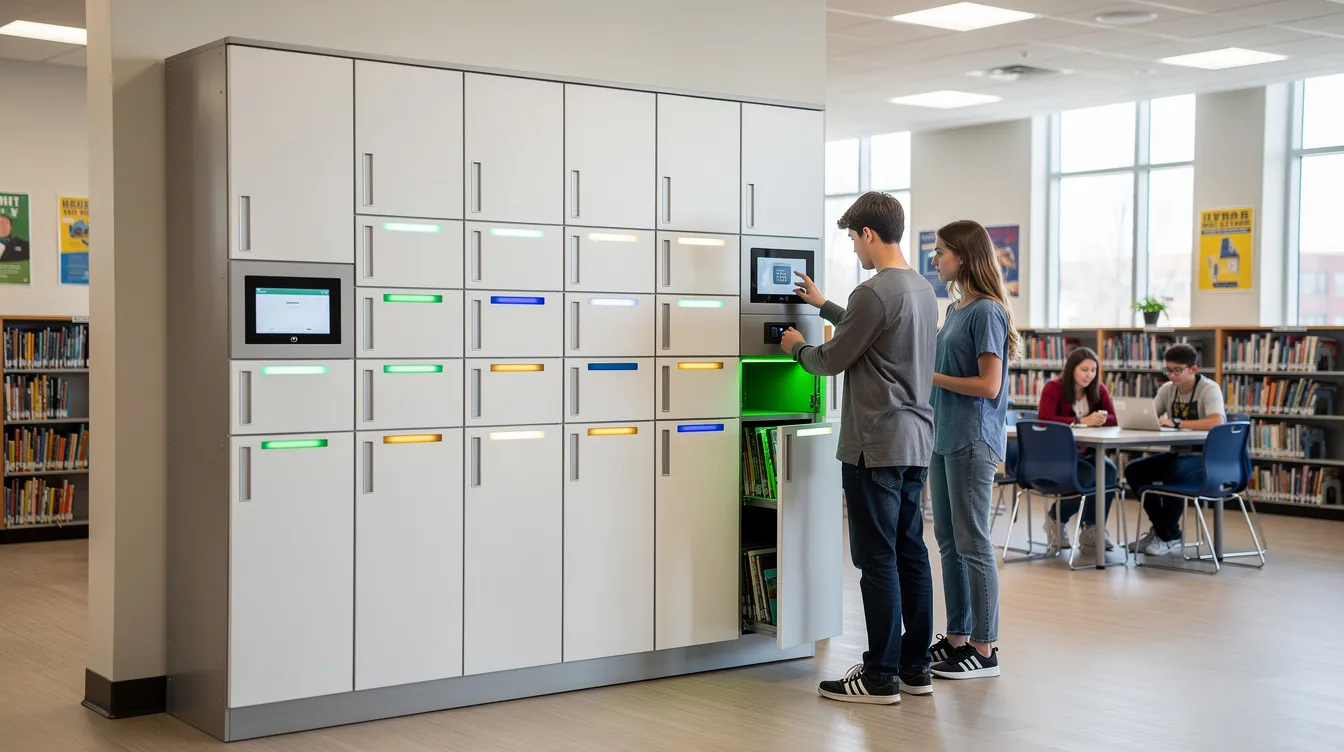
Here’s the before-and-after that sticks with me. Before: it’s 8:02 am, and six kids are already at the help desk with dead or forgotten devices. The teacher’s stalling. IT is juggling paper forms and phone calls. After: there’s a smart locker system outside the media center. A student walks up, taps their ID, grabs a charged loaner, and they’re in class before the bell. Lockers enable students to charge devices during the school day without anyone babysitting the process.
This guide will walk you through choosing, installing, and actually using a Chromebook charging locker setup that fits your school – step by step.
How Chromebook Charging Lockers Actually Work? (Without the Jargon)
Think of a Chromebook charging locker as three things smashed together: a secure steel locker, built-in power, and smart software that tracks everything. That’s it.
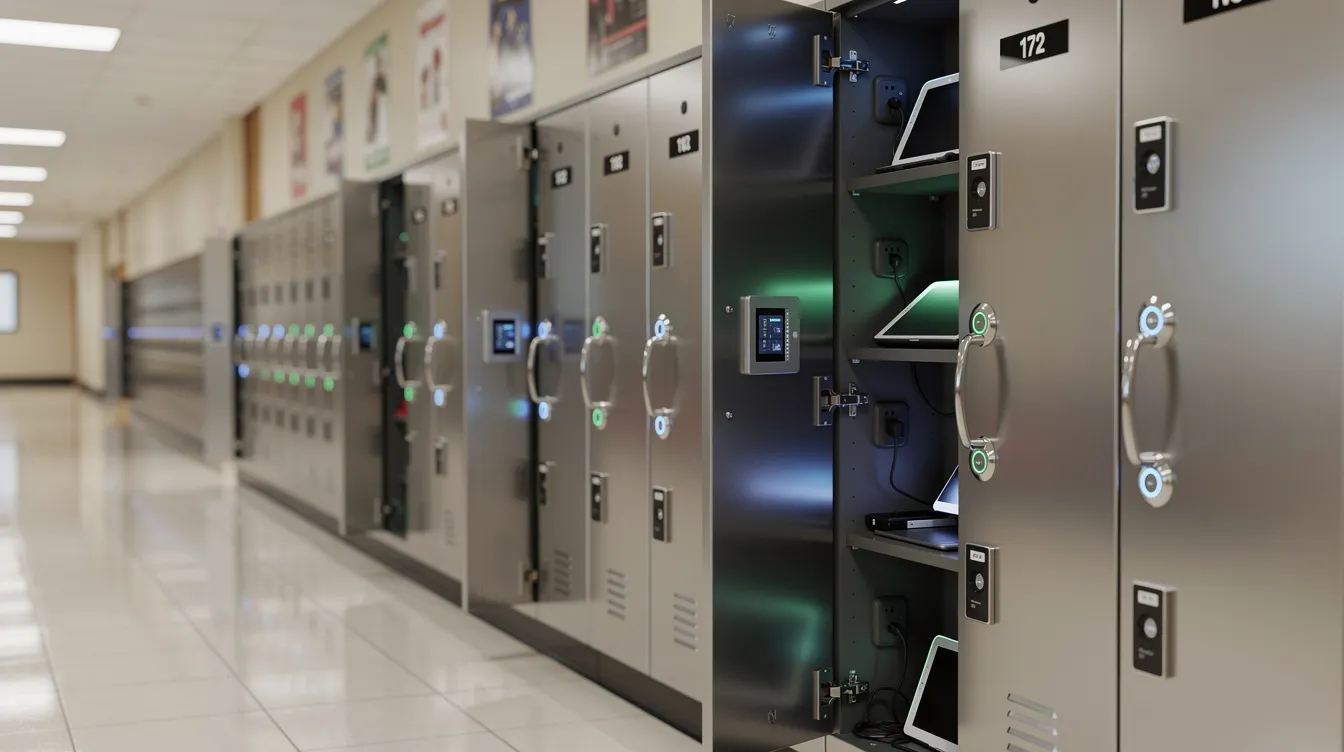
Physically, you’re looking at individual bays – each with its own locking door, internal power outlets or USB-C ports, LED status indicators, and a clearly labeled number. The whole thing is built from heavy-duty steel, designed for the kind of daily abuse that hallways dish out.
The workflow is dead simple:
- Student scans their RFID badge or enters a PIN
- The assigned locker bay door pops open
- Device charges inside while the student goes to class
- Admin sees real-time status in a cloud-based platform
Charging stations can charge 20 to 40 devices simultaneously, and they integrate with existing school networks for enhanced management and tracking. Cloud-connected charging solutions provide usage analytics so you can see which bays get hammered and which sit empty. That’s the difference between modern smart locker systems for schools and the old approach of a metal cabinet with a power strip inside.
Quick comparison so you can see the landscape:
- Charging carts: mobile, hold between 20 and 36 devices, roll between different rooms – great for shared classrooms
- Fixed chromebook charging stations: wall-mounted or floor units in labs or libraries, predictable daily charging in one spot
- Smart lockers: individual locked bays with access control, audit trails, and self-serve workflows – the backbone for 1:1 programs and loaner management
Step 1: Map Your School’s Real-World Charging Problems
Before you buy anything, spend 30 minutes walking your campus. You probably already know where the pain is, but writing it down changes the conversation from “we need lockers” to “here’s exactly why and where.”
Here’s what to look for:
- Where do students congregate with dead devices? (Hallways? Media centers? Outside the front office?)
- What times do devices die most? (Morning? After lunch? Right before state testing?)
- How many help-desk tickets mention “low battery,” “lost charger,” or “missing Chromebooks”?
- Are teachers wasting class time troubleshooting power issues?
- Are there hallway power strips that look like a fire hazard?
Charging solutions can reduce IT bottlenecks tied to low battery – but only if you place them where the problems actually happen. Get IT staff and a couple of teachers involved. This shouldn’t be a server-room-only decision.
Write down your device types too – how many devices you’re managing, whether they’re Chromebooks, Windows laptops, or iPads. That drives slot size, cable management, and power requirements down the road.
Step 2: Choose the Right Charging Solution Mix (Carts, Stations, or Smart Lockers?)
Here’s something people don’t talk about enough: you probably won’t pick just one solution. Most districts blend charging carts, stationary charging stations, and smart lockers depending on the space and the use case, so the key features to compare are the ones that affect daily use across all three.
Charging carts:
- Charging carts can hold between 20 and 36 devices and include locking casters for mobility and stability
- Chromebook charging carts are designed for smaller devices; laptop charging carts support larger devices and higher wattage demands
- Mixed-device charging carts support laptops, Chromebooks, and tablets in the same unit
- Charging carts are designed for student safety and classroom standards, and they support daily instruction in classrooms
- Best when classes share devices across different rooms – roll the cart in, plug it in, roll it out
Fixed charging stations:
- Wall-mounted stations or table space setups in labs, libraries, or shared spaces
- Good for predictable routines and tight spaces where a cart won’t fit
Smart lockers:
- The best solution for 1:1 programs, self-serve loaner access, and secure storage in shared environments
- Students handle everything themselves – no IT standing there
- Audit trails, user access logs, and cloud dashboards come standard on quality systems
A rough “when to choose which” guide: a 1:1 middle or high school benefits most from smart lockers in hallways plus a few chromebook carts for flexibility. An elementary school with shared devices might lean heavier on charging carts mobile setups with fewer lockers. There’s no single right charging cart or locker – it’s about matching the technology to how your school actually runs.
Step 3: Sizing Your Chromebook Charging Lockers and Bays
Under-sizing means students can’t find an open bay. Over-sizing means you’ve spent money on bays that collect dust. Getting this right matters.
Start here:
- Count your students and peak simultaneous users who’d need a locker bay
- Budget a loaner pool of 3-5% of total devices (industry standard)
- Add a small buffer for repairs and new chargers swapped in mid-year
Concrete examples help. A 900-student high school with 1:1 Chromebooks might deploy three 30-bay smart locker units near the main entry, cafeteria, and media center. A 400-student middle school could cover loaner and repair needs with one 40-bay unit in the library.
Watch out for mixed-device effects. Rugged cases, thicker laptops, and bulky power bricks reduce your real-world slot size compared to the brochure number. Modular systems – where you add columns later – protect you from guessing wrong on day one.
Power, Safety, and Cable Management: The Boring Stuff That Actually Matters
This is the section people skip, then regret later when breakers trip during testing week.
Power requirements in plain terms:
- Most Chromebooks draw about 45W to charge; some larger models pull 65W
- A typical school circuit runs 15-amp (about 1,800W) or 20-amp
- A 30-bay locker drawing 45W per device hits 1,350W just for charging – before losses and other loads on that circuit
- Electrical outlets must match the amperage demands of the charging locker to prevent breakers from tripping
- Smart power distribution (staged charging in batches) keeps you from blowing circuits during peak times
Safety features to insist on:
- Charging lockers should use UL-listed or ETL-certified units to minimize electrical hazards
- Surge protection and overcurrent protection on every bay
- Ventilation in charging lockers is necessary to help prevent overheating, heat buildup, and battery degradation – look for built-in airflow channels or fans
Cable management:
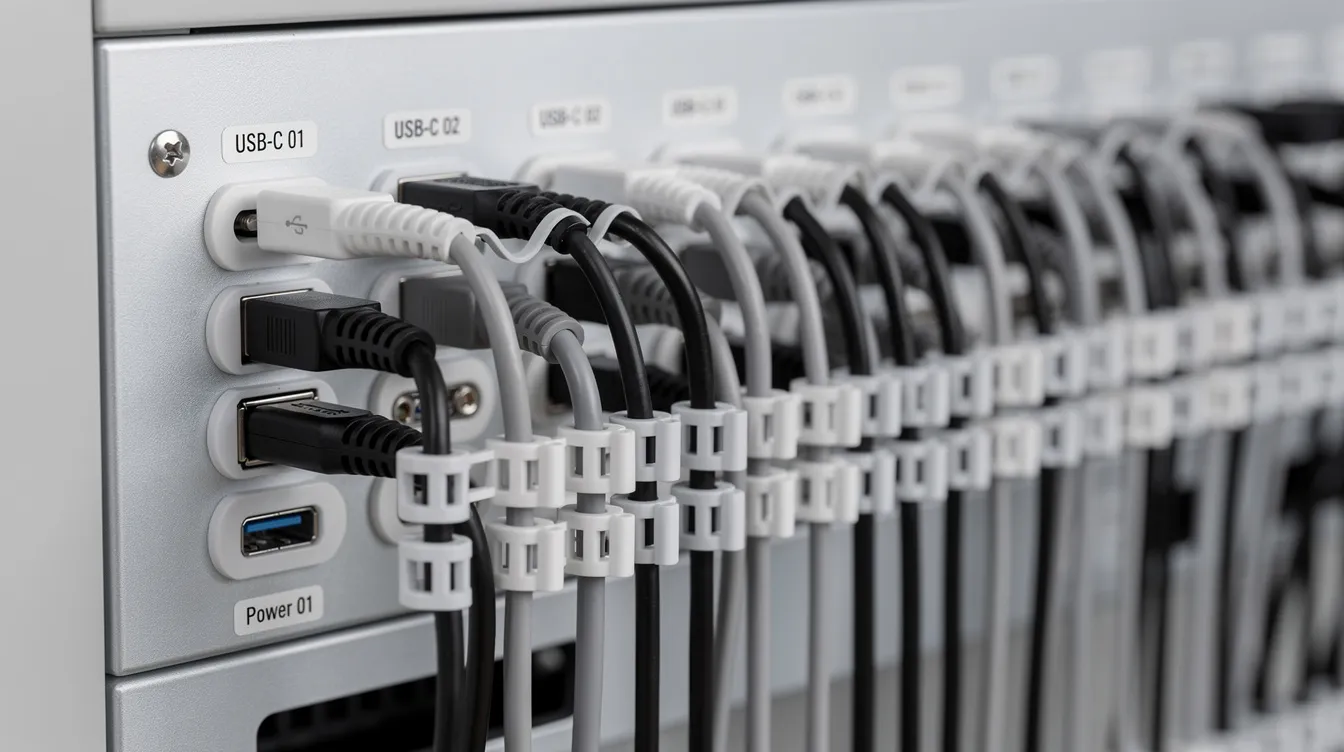
- Cables should be secured and managed to prevent tangling and accidental damage
- USB-C prewired options save setup time for charging stations – especially with newer Chromebook fleets that all use USB-C cables
- HonestWaves designs lockers with rear or side cable routes, strain relief, and easy-access panels so IT teams can swap chargers without dismantling anything
Before delivery, work with facilities to position power outlets correctly. Avoid daisy-chained power strips – they’re a code violation waiting to happen and can cause short circuits.
Smart Locker Workflows That Actually Save Time for IT and Teachers
The real value of a Chromebook charging locker isn’t the steel or the power – it’s the workflows. Charging stations improve IT response times for device issues because the system handles the logistics, not a person.
Self-serve loaner workflow: Student with a dead device walks up → authenticates with RFID or PIN → gets assigned a bay with a ready-to-go Chromebook → their original device goes to a different bay for repair. Smart lockers enable self-serve access to loaner devices without a single phone call.
Repair drop-off workflow: Student drops off a broken device, logs the issue on-screen. IT sees it in the cloud dashboard and swaps in a prepared replacement. Damage reporting procedures should be established so users can flag non-functional devices immediately.
Assigned vs. shared bays: Assigned bays work for long-term student devices. Shared bays are better for “grab any available loaner” hot-swap setups. Clear protocols for check-in and check-out procedures help maintain organization either way.
At Bosqueville ISD, five smart lockers saved the tech team 25-30 hours per week. Their tech director said the lockers “act like a third person for us.” That’s real time savings you can feel.
Where to Place Chromebook Charging Lockers on Campus?
Location makes or breaks usage. If students can’t reach lockers between bells, they won’t bother.
Best spots:
- Near main entrances and attendance offices (catch students on arrival)
- In or adjacent to media centers and libraries
- Next to cafeterias for mid-day laptop charging during lunch
- High-school commons areas where students gather between classes
Chromebook charging lockers require careful site selection for security and cable management. Lockers should be placed in high-visibility areas like libraries or hallways to deter theft and prevent theft in general. Good sightlines for staff, existing camera coverage, and adequate lighting all help. Charging stations can be set up in hallways or media centers depending on traffic patterns.
Don’t forget ADA accessibility: operable parts like keypads and badge readers should fall between 15 and 48 inches above finished floor. Make sure there’s clear floor space in front of the smart locker system for wheelchair access.
Rollout Plan: From Delivery Day to “Everyone Just Uses It”
Don’t just bolt it to the floor and hope. A simple rollout plan prevents confusion and reduces downtime.
Fast setup sequence:
- Confirm power and network drops are ready
- Unbox and anchor lockers – charging lockers should be anchored to prevent tipping and ensure safety during use
- Connect to your school network
- Test a handful of bays with real devices
- Enroll users (import student IDs, set PINs)
Pre-assembled and pre-wired units make this dramatically faster. Most prepped sites go live in a few hours.
Training path:
- Quick 10-minute demo for front office and media center staff
- A 60-second video for students (Bosqueville ISD used student-made videos and Google Classroom announcements – worked great)
- One or two slides for teachers to show during homeroom
Start with a pilot. Pick one grade level or one building, dial in the workflows and settings, then scale across the school district. HonestWaves offers both purchase and rental options, so you can trial lockers for a semester before committing to a full rollout.
Budget, Ownership Models, and Long-Term Support
Let’s talk money. With ESSER funds winding down and 1:1 programs still going strong, planning a 3-5 year device management infrastructure budget is smart.
Funding sources to explore:
- District capital projects and technology refresh cycles
- Safety and security funds (the prevent theft angle matters here)
- Grant programs for phone-free zones that also cover device infrastructure
Buying vs. renting: Ownership means depreciation but long-term value. Renting means lower up-front cost and easier upgrades – especially useful for covering temporary surges like state testing. Check out how smart lockers work and what they really cost in 2026 for a deeper breakdown.
Lifetime warranties on hardware products enhance long-term investment for buyers – look for vendors that back their steel and electronics separately. Routine inspections of charging lockers and devices are necessary for maintaining equipment functionality over the years. Factor in hidden savings too: fewer lost devices, fewer help-desk tickets, less class time wasted asking “who has a working Chromebook?”
HonestWaves Smart Lockers for Schools: What We Do Differently?
We’ve been in the secure charging space long enough to know what schools actually need versus what looks good in a brochure. Smart lockers have been trusted by schools for over 25 years, and we’ve built our SecureTech EDU Series specifically around K-12 realities.
Here’s what we bring to the table:
- Cloud-connected smart lockers for Chromebooks and laptops with real usage analytics
- Data blocking technology on USB ports so student data stays safe
- Optional UV-C disinfection modules for shared devices – huge for loaner programs
- RFID and PIN access with secure locking mechanisms and tamper alerts
- Pre-wired, labeled, and network-ready for fast setup – most sites go live in a day
Here’s a scenario we see all the time: a district has a 15-minute loaner line every morning outside the front office. They install one HonestWaves smart locker near attendance. Within a week, students handle their own device swaps in under a minute. IT staff get their mornings back. Class starts on time. That’s the kind of quiet win that doesn’t make headlines but changes how a school day feels.
If you’re pitching this to leadership, feel free to use our smart locker images in your internal presentations – sometimes a picture of the actual hardware does more convincing than a spreadsheet.
Frequently Asked Questions
How many Chromebooks can a single charging locker support?
Most school-focused lockers handle 10 to 40 bays per unit depending on the model and the size of your devices. You can mix and match columns to reach 80-120 devices in one bank without making the thing impossible to place. The real limit is usually power and floor space, not software – the smart locker system can manage multiple devices charged across several physical units as one logical group.
Can one locker handle different device types at the same time?
Yes. Smart lockers support mixed fleets of devices like iPads and Chromebooks as long as the slot size and cables match. HonestWaves designs bays with flexible cable management so you can run USB-C for newer laptops and legacy barrel chargers where needed. Grouping device types by row – laptops up top, tablets on the bottom – makes daily use and inventory checks easier.
Do students figure out how to use the smart lockers quickly?
Almost always. Most students learn the flow in under a minute: tap ID or enter PIN, door unlocks, done. A short in-homeroom demo or 60-second video during the first week eliminates most confusion. On-screen prompts are written in plain language so staff don’t need to protect devices by hovering over every interaction.
What happens if the power goes out or the network drops?
Devices resume charging as soon as power returns – short outages don’t damage anything. Smart lockers are designed to fail-safe: bays remain locked and audit logs sync when the network comes back. Admins usually have a manual override key or service mode for true emergencies.
Are Chromebook charging lockers safe to put in hallways and unsupervised areas?
Absolutely – that’s what they’re built for. Steel construction, tamper-resistant locking doors, and concealed cables make them tough to mess with. Pair hallway installations with existing cameras and good lighting for extra security. Smart audit trails showing who opened which locker bay and when tend to reduce downtime from both accidental and intentional misuse over time.
How long does it take to install a smart locker system?
A single prepped site with power and network ready often takes just a few hours. Multi-school deployments might roll out over a week or two depending on different spaces and facility readiness. HonestWaves units arrive pre-assembled and pre-wired, which speeds up anchoring and configuration. Loop facilities and IT teams in early so outlets, network drops, and Wi-Fi coverage are sorted before delivery – that’s the real key to keeping install day smooth.