

Ever had that sinking feeling when someone asks, “Who had this laptop last?” and nobody has an answer? If you manage shared devices- Chromebooks in a school hallway, tablets at a nurses’ station, loaner phones at a conference – you already know the pain. Building a device checkout audit trail is how you fix that. It’s your chronological record of who checked out which device, when they took it, when they brought it back, and what happened in between. And honestly, it’s a lot simpler to set up than most people think.
This article walks through the whole process, step by step. Whether you’re running a K–12 Chromebook program, managing clinical tablets in a hospital, or juggling shared laptops in a corporate office, you’ll find something useful here. No security engineering degree required.
What a Device Checkout Audit Trail Actually Is (and Why You Need It Today)
So how do you actually track who used a shared device and when? The short answer: you create a device checkout audit trail – a running, time-stamped chain of audit trail records that shows every checkout, every return, every failed attempt, and every overdue flag, all tied to a specific person and a specific device.
Think of it like a sign-out sheet, except it’s digital, automatic, and actually reliable. An audit trail is a date- and time-stamped record. It captures the who, what, when, where, and why of actions taken on shared equipment. Audit trails should include timestamps and user IDs so there’s never a question about which person had which device at any given moment.
This applies to all kinds of shared devices: Chromebooks, tablets, phones, laptops, portable scanners, loaner iPads, hot-desk kits, two-way radios – basically anything that moves between people’s hands during a workday or school day.
The core value? Accountability. Fewer “lost” devices. Faster incident investigations when something goes wrong. Smoother audits when a compliance officer comes knocking. Shared devices need a chain-of-custody record for every checkout and return, and that’s exactly what an effective audit trail gives you. It should track what device is used, who used it, and what actions were performed.
The rest of this article walks through a practical, step-by-step approach that schools, hospitals, and offices can implement without needing a dedicated SIEM team or a six-figure security budget. Let’s get into it.
Set the Scene: Common Problems With Shared Workplace Devices (Before Audit Trails)
Picture this. It’s Monday morning at a mid-sized high school. A teacher opens the Chromebook cart for first-period testing. There are supposed to be 30 devices inside. She counts 27. Nobody knows where the other three went. The last person to use the cart was “someone from fifth period on Friday,” but that teacher doesn’t remember which students borrowed extras.
Sound familiar? This exact scenario plays out in hospitals too – a shared tablet goes missing right before shift change, and the night nurse swears she returned it. In offices, it’s the shared laptop that was supposed to be in the conference room but ended up in someone’s backpack for the weekend.
Here are the pain points that keep showing up when there’s no audit trail in place:
- Missing devices with no paper trail. Devices vanish, and nobody can prove who had them last.
- Mystery damage. A cracked screen, a broken charging port – and everyone points fingers.
- No proof of who had what. When an incident happens, it’s purely “he said, she said.”
- Slow incident response. IT teams spend hours – sometimes days – trying to reconstruct what happened, what events occurred, and in what order.
- Failed compliance checks. Auditors ask for access logs and you hand them a clipboard with illegible handwriting.
These problems hit specific environments especially hard: K–12 Chromebook programs managing hundreds of devices, university libraries lending laptops overnight, call centers cycling through shared headsets and phones, and patient-family phone loan programs in hospitals.
The “he said / she said” problem is real, and it costs organizations money, time, and trust. Audit trails help identify internal fraud by tracking user actions, but even for honest mistakes, having audit trail data to reference saves everyone a lot of grief.
Here’s the thing – a device checkout audit trail is the simple, boring (in a good way) fix. It doesn’t require fancy AI or a surveillance camera system. It just requires a consistent process and the right hardware.
Clarifying Your Goals: What Should Your Audit Trail Actually Prove?
Before you start buying hardware or configuring software, get clear on what you actually need your audit trail to prove. The biggest mistake people make is over-engineering the system or, worse, building something that looks impressive but doesn’t answer the basic questions that matter during an audit or investigation.
Your device checkout audit trail needs to answer these concrete questions:
- Who checked out this device? (Tied to a unique user ID, not “someone from accounting.”)
- What device did they take? (Serial number, asset tag, or bay number.)
- When did they take it? (Exact timestamp, including timezone.)
- Where did they get it from? (Which locker, cart, station, room, or building.)
- When did they return it? (Or did they not return it at all?)
- What condition was it in when it came back?
These are the activities performed around every device interaction, and they form your core audit trail data.
Now, the specifics shift depending on your sector:
- Schools: You might need to prove which student had a particular Chromebook during a standardized test, especially if there’s a question about exam integrity.
- Hospitals: If a shared tablet was used to access an electronic health record, you need to show which clinician checked it out and when – healthcare organizations must track access to patient records under HIPAA.
- Offices: If someone accessed Exchange Online or a VPN from a shared laptop, you need the checkout record to correlate with digital login logs.
Audit logs capture user activities with timestamps, and user activity trails capture logins, logouts, and access attempts. Creating an effective audit trail for shared workplace devices requires unique user identification – that’s the thread that ties everything together.
These goals drive which audit records and metadata fields you’ll need to capture in the steps ahead. Get them right now, and the rest of the process flows naturally.
Step 1: Inventory Your Shared Devices and Risk Levels
You can’t design audit logging if you don’t know what you’re protecting. This sounds obvious, but you’d be surprised how many organizations skip straight to buying lockers or software without ever doing a proper device inventory.
Build a simple inventory list. For each shared device, you want:
- Device ID / Serial number: The unique identifier. Not “Lab iPad 1” – an actual serial or asset tag like “IP-2347.”
- Device type: Chromebook, iPad, loaner phone, laptop, scanner, two-way radio.
- Assigned location: Building, floor, room number, locker bay.
- Risk level: Low, medium, or high.
Risk classification is where it gets interesting. Devices that touch financial transactions, protected health information, or core business applications get a “high risk” tag. These devices need tighter audit trails, stronger authentication, and longer log retention. A loaner phone at a conference? Probably low risk. A tablet used to review patient charts? That’s high risk, no question.
Financial organizations require audit trails to comply with SOX regulations, and healthcare organizations must track access to patient records under HIPAA. The risk level you assign directly impacts how much logging rigor you’ll need.
If you’re already using HonestWaves smart lockers for equipment management, your physical inventory is partly done – every bay already maps to a device. The trick is making sure your digital inventory matches what’s physically sitting in those bays.
Nearly 40% of businesses experience weekly device loss or misplacement, according to a Zebra Technologies report. If that number surprises you, it shouldn’t. Without a clear inventory and risk classification, devices drift, get borrowed informally, and eventually disappear.
Step 2: Define Your Device Checkout and Return Workflow
Messy workflows produce messy audit logs. Before you worry about fields, retention, or compliance, standardize how devices actually move in and out of people’s hands.
Here’s the basic lifecycle every shared device should follow:
- Available → the device is charged, sitting in its assigned bay or shelf, ready to go.
- Checked out → a user authenticates (badge tap, PIN, SSO), removes the device, and the system logs it.
- In use → the user has the device. The clock is running on their checkout time.
- Checked in → the user returns the device to its bay, the door closes, and the system logs the return.
- Maintenance (optional) → if the device is damaged or needs updates, it gets locked out of circulation until cleared.
- Available again → back in the rotation.
A common logging standard should define what events must be logged in shared environments. At each step, here’s what should be recorded:
- Checkout start: user authentication event (badge tap, PIN entry, SSO login).
- Door open/close: physical sensor confirms the bay was opened and closed.
- Device removal: sensor confirms the device left the bay.
- Overdue status: if the device isn’t returned within the expected window, a flag goes up.
- Return event: device placed back, door closed, system confirms.
- Damage or condition report: optional but valuable – note any visible issues at return.
- Failed access attempts: someone tried to open a bay they weren’t authorized for, or entered the wrong PIN.
Here’s a concrete example: a Chromebook charging locker door opens at 08:12. Student Maria scans her RFID badge. The system records her user ID, device serial #C-127, bay number 14, and timestamp. She closes the door. At 14:45, she returns it. The locker logs the return, notes the device is intact, and marks the bay as available. That’s a clean audit trail.
Keep the workflow simple enough that front-line staff – teachers, nurses, office managers – can actually follow it without a training manual.
Step 3: Decide What to Log in Your Audit Trail (Fields and Data Integrity)
An audit trail is only useful if the right details are captured consistently, every single time. Miss a field, and you’ve got a gap. Log the wrong thing, and you’re just hoarding noise.
Here are the key fields your audit log records should capture:
- User ID: unique identifier tied to a badge, account, or biometric. Not “Guest” or “Room 204.”
- Device ID: serial number or asset tag.
- Locker or station ID: which bay, which locker bank, which room.
- Timestamp with timezone: exact moment of checkout, return, or failed attempt. Implementing time synchronization across devices is crucial for accurate logging – if your lockers are in Eastern time and your server is in UTC, you’ll get confused fast.
- Location: building, floor, campus.
- Action type: checkout, check-in, failed attempt, maintenance lock, overdue flag.
- Result status: success or failure, with a reason if it failed.
Optional but valuable fields:
- Reason for checkout (testing, patient use, field work).
- Expected return time.
- Damage notes or photos.
- IP address for device sign-ins.
- Linked ticket or case number, plus relevant transaction data when a checked-out device is used in regulated or revenue-related workflows and that linkage already exists in your records.
Now here’s something people overlook: audit trails must be tamper-evident to ensure integrity, and audit logs must be tamper-evident to maintain integrity. That means once a log entry is written, nobody should be able to quietly edit or delete it. If someone can go in and erase the record that shows they checked out a device before it was damaged, the whole system falls apart. In higher-integrity environments, logs may also use digital signatures to prove entries were not altered after capture.
Accurate timestamps are critical when correlating an incident across multiple devices. If a security incident involves a device that was checked out at 9:00 AM but your locker logs say 9:15 because the clock drifted, your investigation just got a lot harder.
HonestWaves cloud-connected lockers and charging stations already generate detailed audit logs that you can export and retain. That built-in audit logging saves you from having to bolt on a separate system – the raw log data is captured automatically every time a door opens, a badge is tapped, or a device is returned.
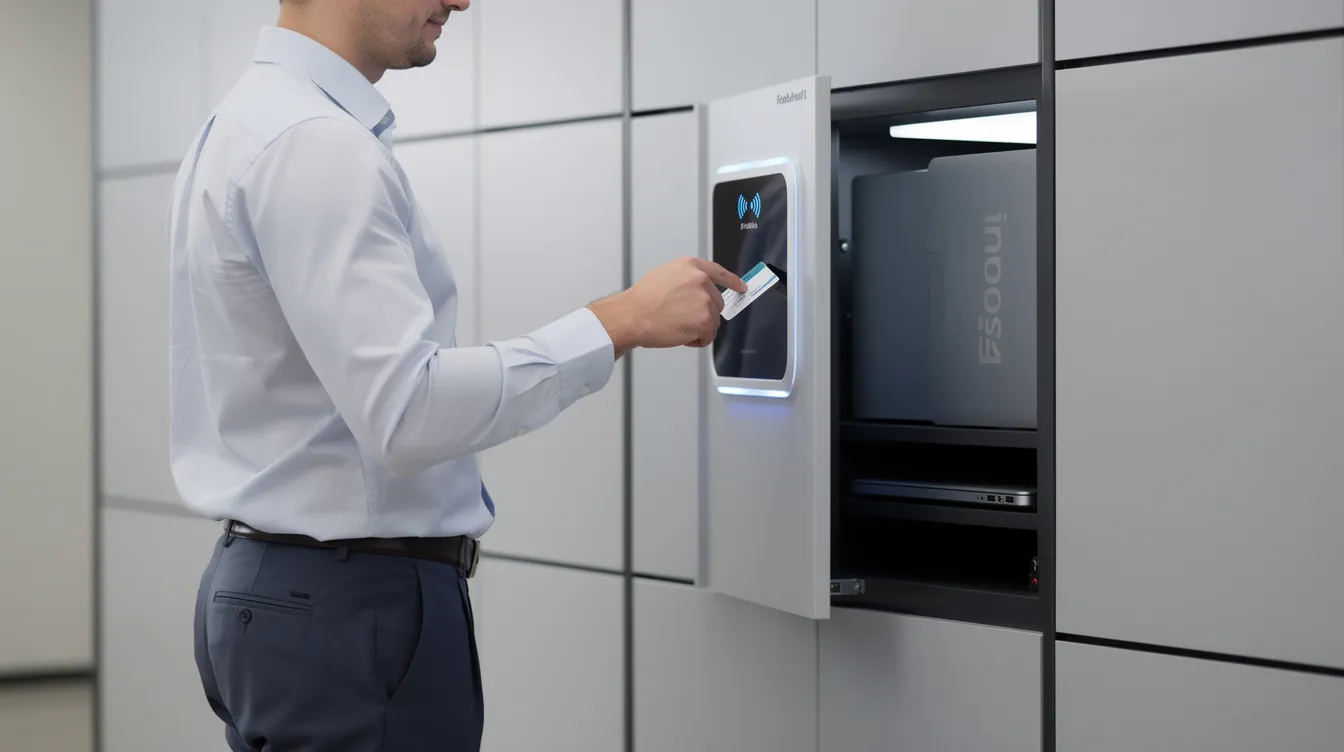
Step 4: Choose Your Identity Model for Shared Devices
Every device action needs to tie back to a real person. Not “User1.” Not “Guest.” Not the department name. A real, individual person. This is the backbone of your audit trail – without it, your log data is just a list of timestamps with no accountability attached.
There are three common identity methods for shared device environments:
- RFID / Badge tap: Fast and seamless. Most schools and hospitals already issue ID badges, so the infrastructure is often there. The downside? Cards get lost, shared, or forgotten. You need a process for handling lost badges quickly. For a deeper dive on options, check out this RFID vs PIN vs QR vs Biometric locker access guide.
- PIN code per user: Simple and low-cost. Works well when users already have assigned codes. The risk is sharing – if two nurses use the same PIN, you’ve lost traceability. Strong access controls matter here.
- SSO (Single Sign-On): Users log in with their corporate or school identity (Google Workspace, Microsoft 365). This is the strongest option for accountability because it ties directly to an existing identity provider. The trade-off? Slower than a badge tap, and it needs reliable network connectivity.
Here’s a quick scenario: a university gives each student an ID card linked to their student account. When they walk up to a Chromebook charging locker, they tap their card. The system logs their student ID, the device serial number, the bay, and the time. No ambiguity. No shared credentials.
Implementing Multi-Factor Authentication (MFA) enhances security for shared devices in high-risk environments. For a hospital tablet that accesses patient records, you might require a badge tap plus a PIN. That extra layer makes it much harder for someone to use a borrowed badge.
Whatever you pick, the rule is simple: one person, one identity, every single time they touch a device. Audit trails help identify internal fraud by tracking user actions – but only if those actions are tied to the right person
Step 5: Map Where Audit Logs Will Live and How Long You Keep Them
Let’s talk about storing audit logs. This is the part where a lot of organizations get vague – “we’ll figure out retention later” – and then scramble when an auditor asks for records from eight months ago.
There are typically three layers of log storage:
- Local device/locker logs: The locker or station itself keeps a buffer of recent events. Useful as a fallback if cloud connectivity drops temporarily.
- Central system logs: Your cloud platform, MDM console, or log management tool aggregates logs from all devices and stations. This is where you’ll do most of your day-to-day searching and reporting.
- Archive/backup: Older logs get moved to long-term storage cold storage, offsite backup, or a compliance archive.
Now, retention periods. This is where it gets real, because the numbers depend on your industry:
| Environment | Suggested Minimum Retention | Notes |
|---|---|---|
| Standard office | 12–18 months | Covers most internal investigations |
| Education (K–12, university) | 12–24 months | Longer if logs contain student PII |
| Healthcare (HIPAA) | 6+ years | HIPAA documentation retention requires at least six years |
| Financial (SOX) | 7+ years | Organizations must retain logs for at least 366 days for SOX compliance, but many keep far longer |
| Medical records-linked (ASTM) | 10+ years | ASTM E2147-18 mandates retention for as long as the associated medical record |
Organizations should retain audit logs for at least 366 days as a baseline – that covers a full year plus one day, which satisfies SOX requirements and gives you enough runway for most investigations.
Here’s a reality check: retention policies often vary across different log sources. Your locker logs, your MDM logs, and your email server logs might all have different retention windows. That’s a problem if you need to correlate events across systems six months from now. Get them aligned.
One more thing: audit logs can generate terabytes of data daily in large enterprises. And only 2% of companies have fully automated their logging capabilities. Most organizations are still somewhere in between – partially automated, partially manual, and occasionally scrambling. The goal isn’t perfection on day one. It’s having a clear plan for where logs go and how long they stay there.
HonestWaves systems can export audit logs to your existing tools, but you still need to define your own retention and backup policy. The platform gives you the data; what you do with it is up to your organization.
Step 6: Connect Your Hardware (Lockers, Stations, Carts) to Central Audit Logging
Disconnected hardware creates a fragmented audit trail. If your Chromebook cart in Room 204 keeps its own local log, and your phone charging station in the break room keeps a separate log, and your laptop locker in the lobby has yet another one – good luck piecing together a complete picture during an investigation.
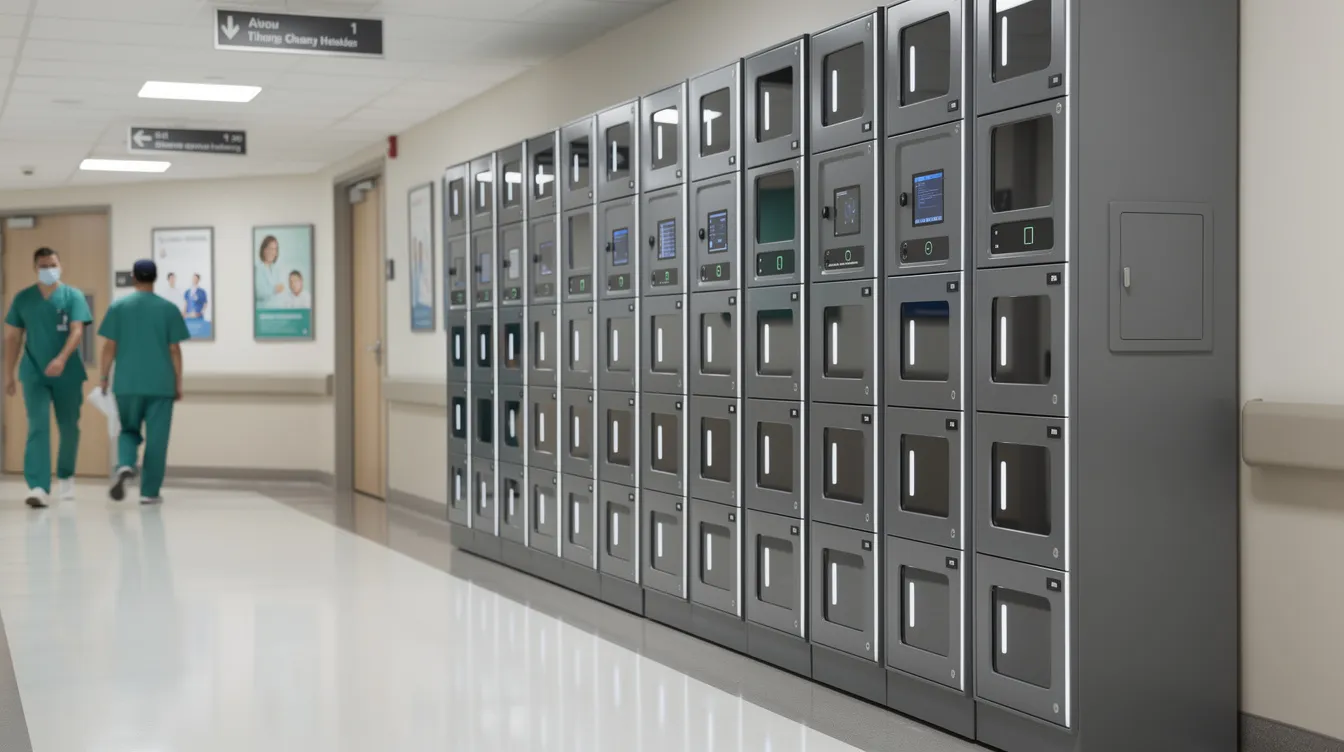
This is where cloud-connected hardware pays for itself. Smart charging lockers and portable kiosks from HonestWaves feed audit logs into a central dashboard automatically. Every door open/close, every successful or failed access attempt, every device bay usage event becomes an audit record tied to a specific device and a specific user.
Centralized log management is essential to prevent tampering or deletion of logs. When logs live only on the local hardware, anyone with physical access could potentially reset or wipe them. Cloud-connected solutions also provide data blocking capabilities for secure device usage, meaning devices can charge safely without risk of unauthorized data transfer.
Here’s a specific example: a hospital uses smart lockers at the nurses’ station. Nurses tap their badges, grab their assigned tablets, and head to patient rooms. Every badge tap and locker opening is logged centrally. At the end of the month, the IT coordinator exports the aggregated logs as a CSV file for their quarterly compliance review. When a tablet went missing last quarter, they had the exact timestamp, user, and bay number within minutes.
If your organization already has a SIEM or log management platform, work with IT to ship these locker logs into it. That way, your device checkout audit trail sits alongside your other system events – network logs, application logs, authentication attempts – in one searchable place.
Step 7: Link Physical Checkout Events With Digital System Activity
Physical-only logs tell you who grabbed a device and when they returned it. That’s valuable. But if that device was used to access corporate email, Exchange Online, an EHR system, or sensitive company data, you need to connect the dots between the physical checkout and the digital activity that followed.
This is about correlating your locker audit logs with login logs from platforms like Microsoft 365, Google Workspace, VPN gateways, or EMR systems.
Here’s a practical example: Device L-045 is checked out by user j.smith at 09:03 from locker bay 7. Your Exchange Online logs show j.smith logging in from that same Chromebook at 09:06, from the same IP block. Later that day, an alert fires because someone accessed a restricted SharePoint folder from that device. Now you’ve got a complete timeline – physical checkout, digital login, suspicious access – all tied to one person and one device.
Audit logs provide evidence for forensic investigations after security incidents. Without this correlation, your security teams are flying blind. They know someone accessed sensitive data, but they can’t prove which physical device was used or who was holding it.
Audit trails provide evidence for legal investigations and disputes too. If a legal dispute arises over a data breach or unauthorized access, the ability to show a connected chain – from locker badge tap to system login to data access – is enormously powerful.
Now here’s the honest part: this doesn’t have to be fully automated on day one. Even manual correlation for serious incidents – pulling the locker log, pulling the Exchange Online log with Exchange Online PowerShell when needed, lining up timestamps in a spreadsheet – is a massive upgrade over having nothing. You can automate later as your security monitoring matures.
Step 8: Write Simple, Clear Device Checkout Policies for Humans (Not Lawyers)
Let’s be real: most device policies are ignored because they read like legal contracts. If your checkout policy is a four-page PDF full of “whereas” and “notwithstanding,” nobody’s reading it.
Your policy should cover these key points, in plain language:
- Who can borrow what: Not everyone needs access to every device. Restrict by role, department, or grade level.
- Maximum checkout duration: One class period? One shift? 24 hours? Be specific.
- Late/overdue rules: What happens if a device isn’t returned on time? An automatic reminder? A flag to a supervisor?
- Damage reporting process: How do users report a cracked screen or missing charger? Make it easy – a button on the locker screen, a quick form, a text to IT.
- Acceptable use basics: Don’t install unauthorized software. Don’t lend the device to someone else. Don’t bypass the locker system.
Make it explicit: users must never bypass the audit trail. That means no tailgating on locker doors, no sharing PINs or badges, and no leaving devices unlocked in hallways. If someone checks out a device under your name because you held the door open, you’re on the hook.
Include a couple of real-world examples of what “good” looks like and what gets flagged. Good: Maria taps her badge, takes her assigned Chromebook, returns it at end of day. Flagged: someone enters wrong PINs three times in a row on a locker they’re not assigned to – that’s a failed access attempt alert.
Audit trails can deter fraud by documenting all user activities. When people know their checkouts are logged, behavior improves. Audit trails simplify audits by providing clear activity logs – and they make the policy easier to enforce because you’ve got evidence, not just rules.
One more tip: display short policy reminders right on the charging locker screen or post them on the station itself. A simple “This device checkout is logged. Return by 3:00 PM.” goes a long way.
Step 9: Train Staff and Students on How the Audit Trail Works (and Why It Protects Them Too)
Training doesn’t have to be a two-hour seminar with a PowerPoint deck nobody remembers. Keep it practical: “Here’s how you check out a device, and here’s why this protects you when something goes wrong.”
The session should walk through a live demo on the real hardware. Tap your badge. Watch the locker door unlock. Remove the device. Close the door. See the confirmation on screen. Done. That’s it. Most people get it in under two minutes.
But here’s the part that actually matters in training: messaging. The audit log protects honest users. If a device is damaged while someone else had it, the log proves it wasn’t you. If a Chromebook goes missing during third period, the trail shows who actually checked it out – not the person who happened to use it the day before.
Framing matters. Don’t say “we’re tracking everything you do.” Say “this system protects you from getting blamed for something that isn’t your fault.” People respond much better to that.
Suggest creating a one-page quick-start guide with screenshots of the locker interface. Keep it visual – a photo of the badge tap area, a screenshot of the confirmation screen, a note about where to report damage. For schools, hand these out at the beginning of the year. For hospitals, include them in onboarding packets.
And for students or busy nurses who are already juggling a hundred things? Keep the tone friendly. Nobody wants to feel like they’re being policed. They want to feel like the system is on their side.
Designing Your Chromebook Charging Locker Guide for Schools
If you work in K–12 IT or school facilities, you probably need a Chromebook Charging Locker Guide for Schools – a practical blueprint that your IT team and facilities staff can share internally and actually use.
This guide should cover several key components:
- Selecting a Chromebook charging locker: How many bays do you need? What power configuration? Do you need AC outlets or USB-C PD? Match the locker to your device fleet.
- Standardizing bay labels: Every bay should have a clear label that matches your inventory system. Bay 14 in Locker Bank A should map to a specific serial number in your asset database.
- Integrating with student ID cards: Most schools already issue student IDs. Linking those to locker access means zero new credentials to manage.
- Setting checkout time limits: Align with class periods. If first period ends at 9:15, the Chromebook should be due back by 9:20. Short windows keep devices circulating.
For school-specific scenarios, think about:
- 1:1 Chromebook programs where every student has an assigned device but needs a secure place to charge and store it.
- Test-day loaners where devices are checked out for standardized testing and must be returned immediately after.
- Library-managed devices available for any student to borrow for research or homework.
- After-hours homework checkouts where students take devices home overnight and return them the next morning.
For a complete walkthrough, check out our Chromebook Charging Lockers for Schools: Complete Guide. It covers hardware selection, deployment planning, and integration with school identity systems in detail.
The guide should be downloadable as a PDF and updated yearly as school tech policies and audit logging expectations evolve. School tech is a moving target – what worked in 2024 might need adjustments by 2026.
Choosing the Right Chromebook Charging Locker Hardware for Audit Trails
Not every charging cart or cabinet can produce usable audit logs. This is a critical distinction that a lot of schools learn the hard way.
Here’s what to look for if you want your hardware to actually support a device checkout audit trail:
- Per-door sensors: Each bay should independently detect when it’s opened and closed. Without door sensors, you’re guessing.
- User authentication support: RFID badge readers, PIN pads, or QR code scanners at the locker. If there’s no way to identify who opened a bay, you don’t have an audit trail – you have a charging cabinet.
- Cloud connectivity: The locker needs to push log data to a central system in real time. If it only stores logs locally, you’re stuck manually pulling data from each unit.
- Exportable audit logs: Can you download a CSV file of all events? Can you filter by date range, user, or device? If not, the data is trapped.
- Integration with your identity provider: Does it connect to your school’s Google Workspace, Active Directory, or student information system?
“Dumb” carts – the metal cabinets with a single padlock and a power strip inside – make device checkout audit trails nearly impossible. You’re back to paper sign-out sheets, which means illegible handwriting, missing entries, and zero accountability. System administrators can’t run search results on a clipboard.
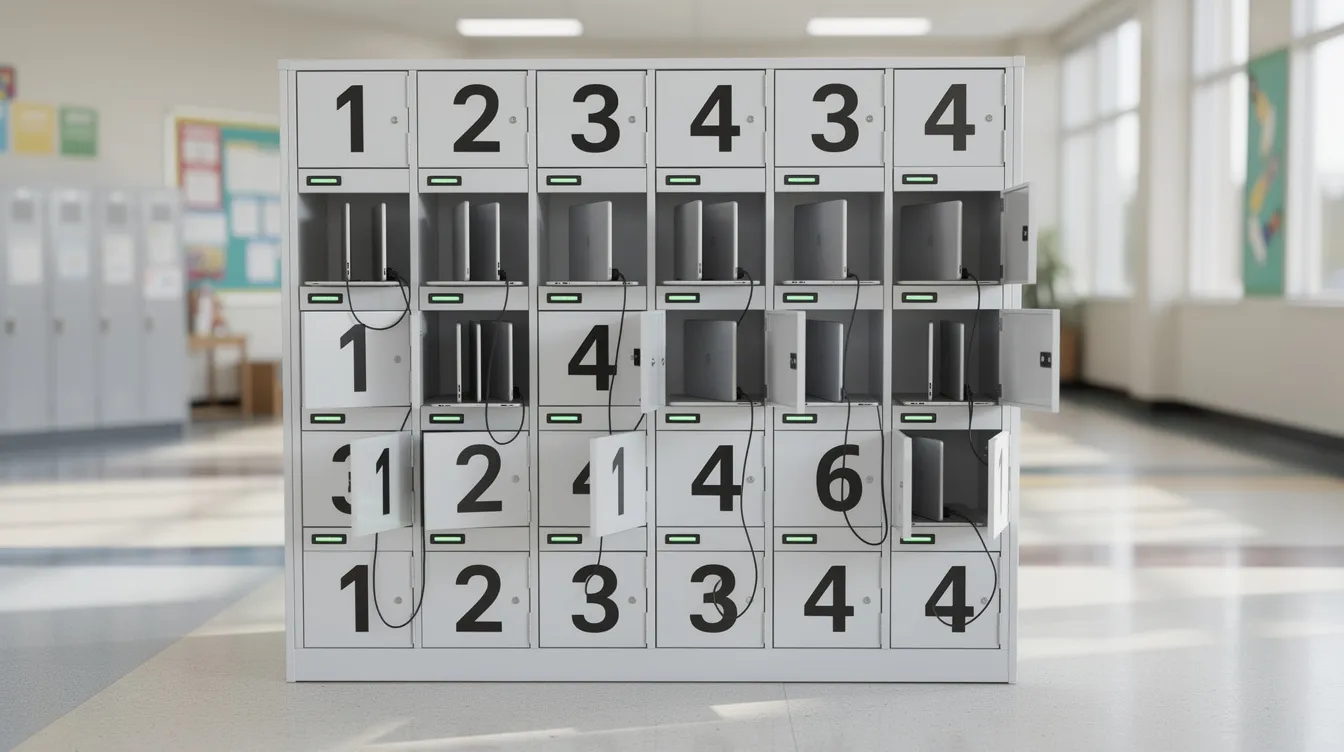
The 30 Bay Smart Secure Chromebook Laptop Locker from HonestWaves is designed specifically for schools that need usage analytics and audit trails built in. Each bay has its own sensor, the system supports multiple authentication methods, and everything feeds into a cloud dashboard.
Prioritize lockers that can show real-time occupancy – which devices are checked out versus sitting idle. This data helps you monitor performance across your fleet and avoid unnecessary purchases. If half your bays are always empty, you might not need that second locker bank.
Balancing User Privacy With Detailed Audit Logs
Let’s acknowledge the elephant in the room: people don’t love the idea of being “tracked,” even when there’s a legitimate reason for it.
Here’s what you should clarify, clearly and early: a device checkout audit log records actions around device checkout and login – not private content. It doesn’t track what websites someone visits, what messages they send, or what they type. This isn’t keystroke monitoring. It’s metadata: who opened a locker, when, which device they took, and when they brought it back. That’s it.
Anonymization or pseudonymization of personal data is important in log management, especially in environments subject to privacy regulations. For EU-based schools or organizations under GDPR, audit logs count as personal data because they identify a person. That means you need to handle them appropriately – restrict access, define retention periods, and be transparent about what you collect.
Some practical transparency tactics:
- Publish a short privacy notice explaining what the audit trail captures and why.
- Tell users how long you retain their data and who can access it internally.
- Limit access to detailed logs. Not every manager needs to see every checkout record – restrict it to IT, security teams, and authorized administrators.
- For external users or visitors using shared devices, include a brief notice on the locker screen itself.
Get HR or legal involved early. They’ll want to be comfortable with how the audit trail is described to staff and students before it goes live. It’s much easier to answer privacy questions proactively than to deal with complaints after the fact.
Ensuring Data Integrity and Tamper-Resistance in Your Audit Trail
Data integrity, in plain terms, means this: logs can’t be quietly edited after the fact because someone is in trouble. If a user checked out a device at 2:00 PM and the device was damaged at 3:00 PM, that record needs to stay exactly as it was captured. No one should be able to go back and change the timestamp, delete the entry, or swap out the user ID.
Audit trails enhance data integrity by documenting changes in an immutable way. Here are the practical controls that make this work:
- Role-based access to audit logs: Only authorized users – typically system administrators and security personnel – should be able to view logs. Nobody should be able to edit them.
- Read-only storage for finalized logs: Once a log entry is written, it moves to a state where modification is blocked. Some systems use write-once storage or append-only databases.
- Regular exports to offsite or cloud backup: If your local hardware is compromised, you still have a copy of the audit data somewhere else.
- Hash chaining: Each log entry includes a checksum based on the previous entry. If someone deletes or modifies a record in the middle, the chain breaks and the tampering is detectable. Think of it like a tamper evident record – you can tell if someone messed with it.
In audits or legal disputes, being able to show that your audit logs are tamper-evident massively increases their credibility. A lawyer asking “how do we know this log wasn’t altered?” is a question you need to have a good answer to.
Audit logs provide evidence for compliance with regulations like HIPAA, and that evidence is only as strong as the integrity protections around it. If your logs can be edited by anyone with admin access, an auditor will rightfully question their reliability.
If you’re evaluating vendors, ask them directly: how does your system protect audit trail data from alteration? How are deleted file events handled? Can system administrators export but not modify historical logs? These are reasonable questions, and any serious vendor – including HonestWaves – should be able to answer them.
Aligning Device Audit Trails With Compliance Requirements
Here’s something that surprises a lot of people: most regulations don’t mention “charging lockers” or “Chromebook carts” by name. But they absolutely care about access controls, audit logging, and accountability for devices that touch sensitive data, and those records support regulatory compliance as much as internal accountability.
Let’s walk through the big ones in conversational terms:
- HIPAA (Health Insurance Portability and Accountability Act): If your shared devices access protected health information, you need audit controls. Healthcare audit trails track access to electronic health records, and the HIPAA Security Rule requires mechanisms to record and examine activity in systems containing ePHI. Retention? At least six years for documentation. Many hospitals treat audit logs the same way.
- FERPA: For schools with student records. While FERPA doesn’t explicitly say “keep device checkout logs,” its requirements for protecting education records and tracking who accessed personally identifiable information imply robust auditing.
- SOX (Sarbanes-Oxley): Financial organizations use audit trails to document transactions and activities. Audit trails are essential for compliance with regulations like SOX, and when shared devices are part of finance workflows, they can also link device custody to transaction records; organizations must retain logs for at least 366 days. Financial institutions use audit trails to review trade details and detect irregularities.
- PCI DSS: If shared devices process payment card data, you need detailed access logs and retention policies.
Audit trails support compliance with SOX, HIPAA, and PCI DSS – those three alone cover a huge portion of regulated industries. Compliance-focused audit trails help organizations meet regulatory standards by providing the detailed information auditors need.
Audit trails can be categorized into six functional types, including compliance trails, security trails, operational trails, and others. Knowing which type you’re building helps you focus your effort.
Healthcare audit trails track access to patient records under HIPAA. Financial organizations use audit trails to document financial transactions and prove legitimate access to sensitive systems. Audit trails help trace irregularities and identify fraud – and they provide evidence for audits, compliance checks, and regulatory fines if something goes wrong.
Audit trails also support legal investigations by documenting actions taken on shared devices. In legal disputes, having a clear chronological record of who had which device and what they did with it can make or break a case.
Good audit trails help with data integrity verification, disaster recovery documentation, and investigations after suspected data breaches or misuse, and they help teams respond faster after security breaches. They’re not just about passing an audit – they’re about building a defensible security posture.
Here’s a practical tip: map each compliance requirement to a specific field or behavior in your audit log. If the regulation says “retain logs 6 years,” set up a rule to archive device checkout records to long-term storage. If it says “review logs periodically,” schedule a periodic review – monthly for high-risk systems, quarterly for lower-risk ones.
And remember: compliance is a moving target. Industry regulations evolve, new guidance gets published, and regulatory requirements shift. Someone in your organization should own the job of reviewing and updating logging practices at least annually. Don’t wait until audit season to find out your practices are outdated.
Using Audit Trails to Spot Unusual Behavior Before It Becomes a Problem
You don’t need to be a SOC analyst to spot suspicious patterns in your device checkout data. You just need to know what “normal” looks like – and then pay attention when something looks different.
Here are concrete examples of patterns that should raise an eyebrow:
- The same user checking out different devices across multiple buildings in a short time window. Why does someone need three different tablets in three different locations within an hour?
- Frequent after-hours checkouts. If someone is consistently grabbing devices at 11 PM from a school locker, that’s worth looking into.
- Repeated failed access attempts on smart lockers. Three wrong PINs in two minutes could be a forgotten code – or it could be someone trying to get into a bay they’re not authorized for. These failed access attempts should trigger alerts.
- A sudden spike in checkouts from one department. Did they just start a new project, or is something else going on?
- Devices that are chronically overdue. One late return is human. Five late returns from the same person is a pattern.
Establishing routine audits and real-time alerting can help identify high-risk anomalies before they turn into full-blown problems. Usage analytics from HonestWaves charging stations can highlight over- or under-utilized lockers and devices, helping you detect anomalies in usage patterns.
Set simple thresholds for alerts:
- Device not returned after X hours → automatic notification to user and supervisor.
- More than Y failed access attempts in Z minutes → alert to IT or security teams.
- Checkout volume from one location exceeds historical average by 50% → flag for review.
You don’t need advanced AI or threat hunting tools to start. Even monthly reviews of dashboard reports – looking at who checked out what, when things were returned late, and which bays are being used most – can catch issues early and help you detect anomalies in your environment.
Security monitoring doesn’t have to mean watching a screen 24/7. It means paying attention to the data you’re already collecting and acting on what it tells you.
Integrating Device Checkout Audit Trails With IT Service and Asset Management
Device checkout doesn’t live in a vacuum. It touches helpdesk tickets, asset management databases, warranty tracking, and repair workflows. If your audit trail is disconnected from these systems, you’re doing double the work.
Here’s how to tie them together:
- Link audit logs to ITSM tools: When a user reports a damaged Chromebook, create a ticket in ServiceNow or Jira Service Management. Reference the ticket number in the checkout notes or attach it to the device’s audit trail. Now you have a clear chain: user reported damage → ticket #4521 → device bay locked for maintenance → device sent for repair → device returned to service.
- Match asset data across systems: The serial numbers in your locker or station software should match exactly what’s in your asset management database. If your smart locker software says “Chromebook S/N: 5KG7H2” but your asset database says “Chromebook CB-5KG7H2,” you’ll have mismatches that make correlation painful.
- Use audit data for budget requests: When it’s time to request new devices or justify a hardware refresh, actual usage data from audit logs is far more persuasive than estimates. “Bay utilization is at 94% during peak hours” is a stronger argument than “we think we need more Chromebooks.”
Here’s a reality that’s worth mentioning: 19% of internal audit functions reported lower budgets in 2025. That means doing more with less. Streamlined audits – where you can pull device usage data, incident history, and compliance documentation from one connected system – save time and reduce the headcount needed for audit preparation.
This alignment also makes inventory counts and refresh planning easier. When you can prove actual device usage from audit logs – not just purchase records – you make smarter decisions about what to keep, what to replace, and what to retire.
Disaster Recovery and Business Continuity: Keeping Audit Trails When Everything Else Breaks
Audit trails matter for disaster recovery, not just day-to-day operations. This is the scenario most people don’t think about until it’s too late.
Consider these situations:
- A fire damages a school wing that housed three Chromebook charging locker banks.
- A flood hits a hospital basement where shared device charging stations are located.
- An extended power outage at an events venue wipes local device logs that were never synced to the cloud.
In each case, the first question after everyone’s safety is confirmed: “What devices were in there, and who had what?”
If your audit logs are stored only on the hardware that was destroyed, you’ve lost everything. That’s why storing audit logs offsite or in redundant cloud locations is critical. Cloud-based logging ensures that even if the physical locker is a pile of melted plastic, your audit trail records survive intact.
Preserved audit records can show which devices were last known to be in a particular locker, room, or user’s possession at the time of the incident. For insurance claims and post-incident reviews, having precise audit trail data can save weeks of manual reconstruction. Instead of asking every staff member “do you remember which device you had?” you can pull the data in minutes.
Disaster recovery planning should explicitly include your device audit logs alongside your other related resources – backups, configuration data, and operating systems images. Don’t treat them as an afterthought.
How a School Used a Chromebook Charging Locker to Fix Its Audit Trail Mess?
Let me walk you through a scenario that’s fictionalized but based on situations we see all the time.
The “before.” Westfield High School – a mid-sized school with about 600 Chromebooks spread across classrooms, a library, and two mobile carts. Devices were managed with paper sign-out sheets on clipboards attached to each cart. Teachers were supposed to log which student took which device, but in practice, the sheets were half-filled, illegible, or missing entirely.
Every month, IT found three to five Chromebooks that couldn’t be located. When a device showed up with a cracked screen, nobody knew who had it last. The tech coordinator spent an estimated five hours per week just tracking down missing equipment. During an internal review, the district asked for device access logs and got handed a stack of paper with coffee stains and crossed-out names.
The shift. Over summer break, the district deployed HonestWaves Chromebook charging lockers in each main hallway – one 30-bay unit per wing, plus a 20-bay unit in the library. Each student’s existing ID card was linked to the locker system. Checkout times were set to align with class periods.
The “after.” Within the first semester:
- Missing devices dropped from three to five per month to zero sustained losses. Two temporary “misplaced” incidents were resolved within hours by checking the audit trail.
- Incident investigations that used to take days now took minutes. When a Chromebook was returned with a broken hinge, the log showed exactly which student had it, what time they checked it out, and when they returned it.
- Damage reports actually decreased. Knowing that checkouts were logged seemed to make students more careful. There’s something about accountability that changes behavior.
- The district’s compliance review was smooth. IT exported the semester’s audit logs as a CSV file and handed it over. No more coffee-stained clipboards.
Lessons learned. They started with 45-minute checkout windows aligned to class periods, but quickly realized that students doing back-to-back classes needed longer windows. They adjusted to 90-minute maximums and the overdue alerts dropped significantly.
They also learned that placing the lockers too far from classrooms created bottlenecks between periods. Moving one bank closer to the science wing cut the morning rush by half.
The takeaway? The technology worked. But the small operational adjustments – checkout windows, locker placement, student communication – made the real difference.
Common Mistakes When Building an Audit Trail for Shared Devices
Nearly everyone gets a few things wrong the first time. That’s fine – as long as you catch them before your first real audit or investigation.
Here are the pitfalls we see most often:
- Relying on paper sign-out sheets. Still shockingly common. Paper logs are prone to human error, missing entries, illegible handwriting, and they offer zero searchability. You can’t filter a clipboard by date range.
- Letting people share locker PINs or badges. If two people use the same PIN, your audit trail is compromised. You can’t tell who actually had the device. Authorized users should each have unique credentials.
- Not testing log exports. Many organizations set up logging and never actually test whether they can export and read the data. Then audit season arrives and the export is incomplete or in a format nobody can open.
- Forgetting to set retention periods. Logs pile up without a plan. Or worse, logs auto-delete after 30 days and you lose critical data.
- Ignoring time zones. If your locker is in Central time, your cloud dashboard is in UTC, and your MDM is in Eastern, correlating events across systems becomes a nightmare.
- Inconsistent device naming. “Lab iPad 1” in the locker, “iPad #IP-23” in the asset database, and “Maria’s iPad” in the helpdesk ticket. Pick one naming convention and stick with it.
- Skipping the human test. If you design the workflow in a conference room without involving a single front-line user – a teacher, a nurse, an office manager – you’ll miss practical issues that make the system frustrating to use.
A simple pre-launch checklist helps: test a full “borrow → use → return → incident → investigation → report” scenario before going live. If you can’t trace a device from checkout to return using only your audit logs, something’s broken.
Involve at least one front-line user in the design. They’ll tell you things like “there’s no power outlet near where you want to put the locker” or “students won’t walk to the other end of the building between classes.” That kind of feedback is gold.
FAQs
Do I Really Need a Device Checkout Audit Trail if I Trust My Team?
Yes – and here’s why. Trust and verification aren’t opposites. An audit trail isn’t about assuming people are dishonest. It’s about having a clear record when things go sideways, which they inevitably do.
How Long Should I Keep Shared Device Audit Logs?
For most organizations without specific regulatory pressure, 12 to 18 months is a solid default. That covers the window for most internal investigations and gives you enough historical data to spot trends. But if you’re in a regulated industry, the numbers go up. Financial organizations and hospitals may need several years of audit trail retention.
Will a Chromebook Charging Locker Slow Students Down Between Classes?
This is probably the most common concern we hear from school administrators, and the short answer is: not really. Modern Chromebook charging locker systems are designed for speed. A badge tap takes about one second. The door unlocks immediately. Students grab their device, close the door, and they’re walking to class.
What’s the Difference Between an Audit Log and an Audit Trail for Shared Devices?
An audit log is a single recorded event. Think of it as one line in a spreadsheet: “Locker 12 opened by j.smith at 08:02 AM.” An audit trail is the full story built from many of those individual events. It’s the chronological record that connects the checkout, the login to Exchange Online from that device, the return, and any incident notes – all woven into one understandable timeline.